Powder coating - Craftsman


I wanted to black out some of the brackets and bolts for a cleaner look. I tried Rustoleum spray enamel, but found that it begins to chip off after about a year and anytime a bolt is torqued. Sears introduced a home powder coater that looked simple enough to get the job done. The following is my first attempt at powder coating.
The process is not difficult but a bit time consuming. A larger oven would allow more parts to be done at the same time.


Materials:
-
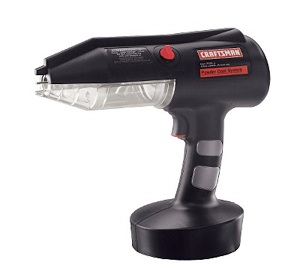
• Sears Craftsman Powder Coater - Sears item# 00917288000 Mfr. model# 17288
-
• Toaster Oven (Not For Food)
-
• Oven Thermometer (Target)
-
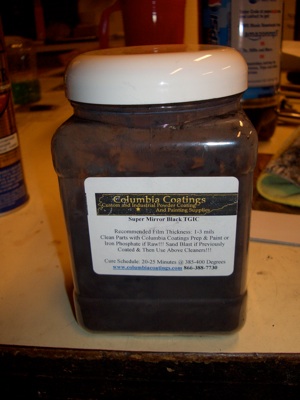
• Columbia Coatings Powder (www.columbiacoatings.com - Sears - Harbor Freight)
-
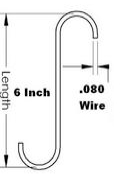
• S - Hooks (www.columbiacoatings.com - Sears)
-
• Needle Nose Pliers
-
• 150 Grit Sandpaper
-
• Paper Towels
-
• Rags
-
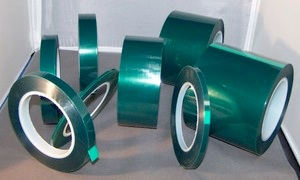
• Heat Masking Tape (www.columbiacoatings.com - Sears)
-
• Plugs & Caps to protect inside and outside threads. (www.columbiacoatings.com - Sears)
-
• Galvanized Bailing Wire (www.columbiacoatings.com)
-
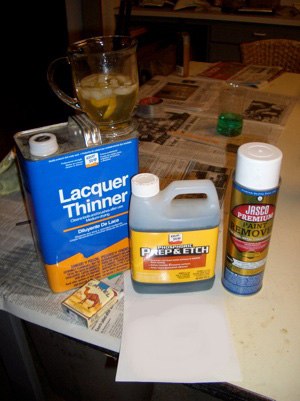
• Jasco Paint Remover (Home Depot)
-
• Lacquer Thinner (Home Depot)
-
• Phosphoric Prep & Etch (Home Depot)
Dry Run:
I can’t stress enough that you do a dry run on your parts to make sure that you can handle the part, transfer the part, spray the part, and hang the part in the oven with out the raw powder touching the hanging system or the oven interiors prior to powder coating.
Prep:
I followed the same procedure for raw, previously painted and chromed parts. Yes, you can powder coat over chrome.
-
• Wipe down with lacquer thinner to remove grease
-
• Mask part (if necessary) with heat tape.
-
• Spray part with Jasco Paint Premium Paint Remover to remove impurities & paint.
-
• Wait 10 minutes, then wipe with cloth segregated for this purpose (Repeat if necessary).
-
• Rinse with water and dry.
-
• Wipe with lacquer thinner again.
-
• Sand part with 150 grit paper until all areas scuffed. File over sharp 90º edges if possible.
-
• Blow off with compressed air.
-
• Brush or spray on the dilution of Prep and Etch and let set for 15-30 minutes.
-
• Rinse off with water.
-
• Blow dry and then wipe with lacquer thinner one last time.


Use latex gloves if you must touch the part where it is to be powder coated.
Preheat:
I took this opportunity to test my hanging and transfer method before actually committing powder to the part.
Here we used a pair of needle nosed pliers to hold the S-hooks and hang the muffler exhaust brackets from the calrod in the oven.
Once the oven reaches 375 degrees, allow the part to preheat for 10 minutes. This allows any air to outgas which will prevent bubbling. It also allows the powder to reach smaller crevices and bends in the part.

Powder Application:
This is the easiest part. Allow the preheated part to cool for 3-5 minutes, then apply powder. Hold the gun about 6” from the part and apply much the same as spray paint. The powder exits the gun as a cloud and is drawn to the part through opposite charges.
The gun comes with a grounding wire equipped with an alligator clip. You must attached this to the part, the hanging wire, or the metal piece the part is hung from. Bottom line: you need to make an electrical connection to the part so the powder will be attracted to it.

Hold the gun about 6” from the part and spray the powder as evently as you can. Note the metal showing through the powder in the picture below. This is not quite heavy enough. Apply powder until you can’t see the metal, but no more. This allows the powder to flow out and become smooth. In the part we tested where we could still see metal, orange peeling occurred.
Also, note the length of piano hinge at the back of the foil lined box. For small parts like bolts, and washers, this worked great. With the grounding clip attached to the piano hinge, it allowed the S-hooks a place to hang and conducted the current to the part.
I lined a box with aluminum foil to catch the powder which can be reclaimed. I doubt that I will. Tape was applied to the foil to insulate the hanging rod (piano hinge).

What worked best was a powder application that looked like a velvet Elvis paining with no metal showing through.
If you don’t like the way the part looks or a foreign object lands on the part, simply brush it off and recoat.

Parts That Don’t Fit In Oven:
Wrapping the openings in the door with aluminum foil contained the heat quite adequately. I also noted that the heat wasn’t transmitted to the portion outside of the oven so handling the part during powder coating wasn’t a problem.


Powder Curing:
Curing times vary according to powder manufacturer. The Columbia powder I used specified 20 - 25 minutes at 385º - 400º.
Curing time starts once the part is at temperature and the powder has completely liquified. It does not matter if the oven is preheated. Obviously, it will take longer to get to cure time if the oven is cold.
It is also recommended that the part remains in the oven while the oven cools. I left the parts in the oven until it had cooled to 250º and moved on.
Here is the finished rear fender bracket.


The saddlebag/exhaust brackets:


Some bolts and washers:

These were the finished parts from this session:

Summary:
The pictures don’t portray the beauty and quality of this finish. Overall I am quite pleased with the results and plan on doing more!!!
Review of the Craftsman Gun:
Overall the quality is good but is obviously a home use unit intended for small parts and brackets. It doesn’t hold enough powder for large projects.
The unit is extremely easy to set up and use and the results are nothing short of amazing.
Some have complained about the cup lock on the gun. It is lightweight plastic and has a 90º motion from unlocked to locked. I can see how it would break easily if turned beyond 90º. However, the lock is adequate and if used properly should pose no problem.
What caused me more trouble was the locking lid on the powder container. Basically, it is a turn and lock setup much like an 1157 taillight bulb in your car. Once powder gets in the grooves it tends to stick. What seemed to work was to brush out the channels where the nubs turn and lock before closing the lid. Also, it was cold in the garage. I used a heat gun and gently heated the outer container which expanded it just enough to open. I don’t like the design of the container, but if it should break, it can easily be replaced at sears for about $10.
2005 FLHRSI Road King Custom EFI